How to Turn on Keurig? Good Tips and Guides in 2024
HOW TO TURN ON KEURIG? GOOD TIPS AND GUIDES IN 2024.
For many coffee enthusiasts and tea lovers alike, there’s nothing quite like the convenience and efficiency of a Keurig coffee maker. Designed to brew a single cup of your favorite beverage in mere moments, Keurig machines have become a staple in countless kitchens and offices worldwide.
However, if you’ve recently acquired a Keurig or are using one for the first time, you might find yourself wondering how to unleash its full potential and experience that delicious, freshly brewed goodness.
In this comprehensive guide, we’ll take you step-by-step through the process of How to Turn on Keurig, ensuring you start your day on the right note or take a well-deserved coffee break with minimal fuss. Whether you’re a novice Keurig user or simply need a refresher, we’ve got you covered. So, grab your favorite coffee mug and let’s dive into the world of Keurig brewing!

HOW TO TURN ON KEURIG?
1. WHAT IS KEURIG?
Keurig is a popular brand of coffee makers known for their single-serve brewing technology. Founded in 1992, the company has revolutionized the way people make and enjoy their favorite hot beverages, such as coffee, tea, hot chocolate, and more.
The name “Keurig” is derived from the Dutch word for excellence, and the brand has certainly lived up to its name by providing convenient and high-quality brewing solutions to millions of homes and offices worldwide.
At the core of Keurig’s success is its patented K-Cup technology. K-Cups are small, single-serve pods filled with pre-measured coffee grounds, tea leaves, or other beverage ingredients. These pods are designed to fit perfectly into Keurig machines, ensuring a consistent and precise brewing experience every time.
When you want a cup of coffee, all you need to do is insert a K-Cup into the machine, close the lid, and press a button. The Keurig takes care of the rest, brewing your chosen beverage in a matter of seconds.
Keurig offers a wide variety of flavors and beverage options through its K-Cup system, making it a convenient and customizable choice for individuals with diverse tastes. Whether you prefer a bold and robust coffee, a soothing cup of tea, or even iced beverages, Keurig machines can cater to your preferences.
In addition to the home market, Keurig has made a significant impact in offices, hotels, and other commercial settings, where the need for quick and hassle-free beverage preparation is essential.
Overall, Keurig has become synonymous with simplicity, speed, and consistently good coffee, making it a beloved choice for coffee enthusiasts and anyone who appreciates a fast and reliable cup of their favorite hot drink.
You can see How to Turn on Keurig as below.
2. HOW MANY TYPES OF KEURIG?
As of my know, Keurig offers a range of coffee makers under various product lines, each catering to different preferences and needs. It’s important to note that product offerings may have expanded or changed since then, but here are some of the main types of Keurig machines available at that time:
- Keurig Classic Series: This series includes the classic Keurig models that offer basic features like brewing a single cup of coffee with a variety of K-Cup pod sizes. They typically have simple button controls and are a great entry-level option.
- Keurig Plus Series: The Keurig Plus Series includes models with added features like temperature control, strength control, and programmable settings, allowing users to customize their brewing experience further.
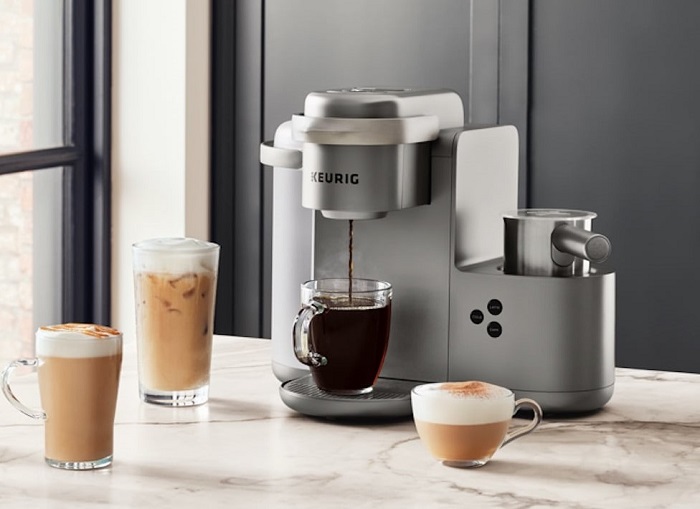
- Keurig K-Cafe Series: These machines are designed for those who enjoy specialty coffee drinks. In addition to brewing regular coffee, they have a “shot” feature that can brew concentrated coffee for making lattes and cappuccinos. They also come with a built-in milk frother.
- Keurig K-Elite Series: The K-Elite models are known for their sleek design and premium features. They often include extra-large water reservoirs, strong brew options, temperature adjustments, and other advanced functionalities.
- Keurig K-Mini Series: These compact and portable machines are ideal for small spaces or for those who are always on the go. They offer a single-cup brew and have a smaller water reservoir.
- Keurig K-Duo Series: The K-Duo models are a combination of single-serve and traditional drip coffee makers. They offer the flexibility to brew a single cup or a carafe of coffee, providing options for both individual enjoyment and serving larger groups.
- Keurig Commercial Brewers: Keurig also manufactures commercial-grade machines for office and commercial settings, which can handle higher volumes and offer additional features suited for professional environments.
Within each series, there may be different models with varying specifications and features. Keurig has been consistently innovating and introducing new products to meet the demands of coffee enthusiasts and users with diverse preferences.
To get the most up-to-date information on the current Keurig product lineup, I recommend visiting Keurig’s official website or checking with authorized retailers.
You can refer How to Turn on Keurig as below.
3. WHAT ARE BENEFITS OF KEURIG?
Keurig coffee makers offer several benefits that have contributed to their popularity among coffee enthusiasts and casual users alike. Here are some of the key advantages of using a Keurig machine:
- Convenience: One of the primary benefits of Keurig machines is their unmatched convenience. Brewing a cup of coffee or other hot beverage is as simple as inserting a K-Cup pod, pressing a button, and waiting for a few seconds. This makes it easy to enjoy a freshly brewed cup without the need for complex brewing processes or measuring out coffee grounds.
- Single-Serve Versatility: Keurig’s single-serve brewing technology allows each user to have their preferred beverage without the need to brew an entire pot. This is especially beneficial in households or offices with multiple coffee drinkers who have different taste preferences. Each person can choose from a wide variety of K-Cup flavors and brew their favorite drink in seconds.
- Consistency: With Keurig, you can expect consistent results with each cup you brew. The pre-measured K-Cup pods ensure that the right amount of coffee or tea is used every time, eliminating the guesswork associated with traditional brewing methods.
- Speed: Keurig machines brew beverages quickly, typically in under a minute. This is ideal for busy mornings when you’re rushing to get ready for work or need a quick energy boost to start your day.
- Less Waste: Keurig’s single-serve approach can reduce coffee waste compared to traditional drip machines that make larger pots. You only brew what you need, minimizing leftover coffee that might go to waste.
- Variety of Beverage Options: Keurig offers an extensive range of K-Cup flavors, including various coffee blends, teas, hot chocolates, and other specialty beverages. This variety caters to diverse tastes and allows users to experiment with different flavors easily.
- Low Maintenance: Keurig machines are generally easy to clean and maintain. Most models come with removable parts that can be easily washed, and regular descaling can help keep the machine in optimal condition.
- Energy Efficiency: Many Keurig models have energy-saving features, such as automatic shut-off after a period of inactivity, which helps conserve energy and reduce electricity consumption.
- Ideal for Small Spaces: Keurig’s compact and space-saving design makes them ideal for small kitchens, dorm rooms, offices, or any area with limited countertop space.
- Customization: Some Keurig models come with features like adjustable brew strength, temperature control, and programmable settings, allowing users to customize their brewing experience to suit their preferences.
Overall, the benefits of Keurig machines lie in their simplicity, efficiency, and ability to cater to individual preferences, making them a popular choice for coffee and hot beverage lovers seeking a quick and hassle-free brewing solution.
Please see How to Turn on Keurig as below.
4. WHAT SHOULD WE CONSIDER BEFORE BUYING KEURIG?
Before purchasing a Keurig coffee maker, there are several factors to consider ensuring you choose the model that best suits your needs and preferences. Here are some key considerations:
- Brewing Size Options: Different Keurig models offer various brewing size options, ranging from small cups to carafes. Consider how much coffee you typically consume at a time and whether you want the flexibility to brew larger quantities for guests or special occasions.
- Brewing Features: Evaluate the brewing features offered by the Keurig model. Some machines have adjustable brew strength, temperature control, and programmable settings, allowing you to customize your coffee experience.
- Water Reservoir Size: The water reservoir capacity determines how many cups you can brew before needing to refill. If you want a machine with less frequent refilling, opt for a model with a larger water reservoir.
- Space and Design: Consider the available space in your kitchen or wherever you plan to place the Keurig. Choose a model that fits comfortably on your countertop and complements your kitchen’s aesthetics.
- Energy Efficiency: Look for models with energy-saving features, such as auto-off functionality, which can help reduce electricity consumption when the machine is not in use.
- K-Cup Compatibility: Most Keurig machines are compatible with official Keurig K-Cup pods, but some models may also support third-party or reusable pods. If you prefer using a wider range of coffee brands or want to reduce waste with reusable pods, check for compatibility.
- Maintenance and Cleaning: Consider how easy it is to clean and maintain the machine. Removable parts and descaling features can make cleaning more convenient.
- Budget: Keurig machines come in various price ranges, so establish your budget and find a model that offers the features you need within that range.
- User Reviews and Ratings: Read customer reviews and ratings for the Keurig models you are interested in. Feedback from other users can provide valuable insights into the machine’s performance and reliability.
- Warranty and Customer Support: Check the warranty period and the availability of customer support for the Keurig model you plan to purchase. A reliable warranty and good customer support can give you peace of mind in case of any issues.
- Longevity and Durability: Consider the build quality and materials used in the machine. Investing in a durable and long-lasting Keurig can save you money and hassle in the long run.
- Purpose and Usage: Think about how you plan to use the Keurig. If it’s primarily for personal use at home, a smaller and simpler model may suffice. For an office or commercial setting, you might need a more robust and larger-capacity machine.
By considering these factors, you can make an informed decision and select the Keurig model that aligns perfectly with your coffee brewing needs and preferences.
Please refer How to Turn on Keurig as below.
5. STEPS ON HOW TO USE KEURIG?
Using a Keurig coffee maker is a simple and straightforward process. Here are the general steps to follow:
Step 1: Prepare the Machine
- Place your Keurig coffee maker on a stable and level surface near an electrical outlet.
- Lift the handle on the top of the machine to access the K-Cup holder.
Step 2: Add Water to the Reservoir
- Open the water reservoir lid located on the left side of the machine.
- Fill the reservoir with clean, cold water. The water level should be between the minimum and maximum fill lines, which are usually marked inside the reservoir.
- Close the reservoir lid securely.
Step 3: Power On the Machine
- Plug in the Keurig machine to an electrical outlet.
- The control panel should light up. If not, look for the power button and turn on the machine.
Step 4: Preheat the Machine (Optional)
- Some Keurig models require preheating before brewing. Check your specific model’s instructions to see if this step is necessary. If preheating is needed, it usually takes a minute or two.
Step 5: Insert the K-Cup Pod
- Lift the handle on the top of the Keurig to open the K-Cup holder.
- Insert the K-Cup pod of your choice into the holder. Make sure the foil top is facing up and the K-Cup is placed securely in the holder.
- Close the handle firmly to puncture the foil seal and lock the K-Cup in place.
Step 6: Select Your Brew Size (Optional)
- If your Keurig model offers multiple brew size options, use the control panel to select your desired cup size. Some common options include 6 oz, 8 oz, and 10 oz.
Step 7: Brew Your Beverage
- Place a mug on the drip tray beneath the K-Cup holder.
- Press the “Brew” button on the control panel to start the brewing process.
- The Keurig will draw water from the reservoir, heat it, and pass it through the K-Cup pod to brew your beverage.
- Wait for the brewing process to complete. It usually takes just a few seconds to a minute, depending on the size of your selected brew.
Step 8: Enjoy Your Beverage
- Once the brewing is finished, the machine will automatically stop dispensing.
- Lift the handle to remove the used K-Cup pod, and you can now enjoy your freshly brewed coffee, tea, or other hot beverage.
Step 9: Clean and Maintain the Machine
- Regularly clean the K-Cup holder, drip tray, and water reservoir to keep your Keurig in good working condition.
- Some Keurig models have descaling features to help remove mineral buildup. Follow the manufacturer’s instructions for descaling when necessary.
Please note that the steps may vary slightly depending on the specific Keurig model you have. Always refer to the user manual that comes with your machine for model-specific instructions and safety guidelines.
There are How to Turn on Keurig as below.
6. HOW TO TURN ON KEURIG?
To turn on a Keurig coffee maker, follow these simple steps:
- Prepare the Machine: Place your Keurig on a stable and level surface near an electrical outlet.
- Water Reservoir: Open the water reservoir lid located on the left or right side of the machine (depending on the model). Fill the reservoir with clean, cold water. The water level should be between the minimum and maximum fill lines, usually marked inside the reservoir. Close the reservoir lid securely.
- Power On: Plug the Keurig machine into the electrical outlet. Look for the power button, usually located on the control panel or the side of the machine. Press the power button to turn on the Keurig.
- Preheating (Optional): Some Keurig models require preheating before brewing. If your machine needs preheating, it will indicate this on the display panel. Wait for the machine to finish the preheating process before proceeding to the next step.
- Ready to Brew: Once the Keurig is powered on and ready to brew, the control panel should light up, indicating that the machine is operational.
Now that your Keurig is turned on and ready to go, you can proceed to brew your favorite hot beverage using K-Cup pods. Simply follow the steps in my previous response on “Steps on How to Use Keurig” to brew your desired drink.
Remember to always check the specific instructions in the user manual that came with your Keurig model, as different models may have slight variations in their operation.
We introduce How to Turn on Keurig as above.
7. HOW TO CLEAN KEURIG?
Regular cleaning is essential to maintain the performance and longevity of your Keurig coffee maker. Here’s a step-by-step guide on how to clean your Keurig:
Daily Cleaning (After Each Use):
- Remove the Used K-Cup: After brewing your beverage, lift the handle and dispose of the used K-Cup pod from the K-Cup holder.
- Empty the Drip Tray: Remove the drip tray (the platform where your mug sits) and discard any liquid that may have accumulated. Rinse the drip tray with warm, soapy water and let it dry.
- Clean the K-Cup Holder: Open the K-Cup holder and rinse it under running water to remove any coffee grounds or tea leaves. You can use a soft brush or a toothbrush to clean hard-to-reach areas. Make sure the holder is dry before closing it.
Weekly Cleaning:
- Wash the Water Reservoir: Remove the water reservoir from the Keurig machine. Wash it with warm, soapy water, and rinse thoroughly. Ensure there are no soap residues. Let the reservoir air-dry before placing it back into the machine.
- Clean Exterior Surfaces: Wipe down the exterior of the machine with a damp cloth. If there are stubborn stains, use a mixture of equal parts water and white vinegar to clean the surfaces. Avoid using abrasive cleaners or scouring pads that could damage the machine’s finish.
Monthly Cleaning (Descaling): Descaling is necessary to remove mineral buildup (scale) that can accumulate inside the Keurig’s water reservoir and internal components. Mineral deposits can affect the machine’s performance and the taste of your beverages.
- Prepare the Solution: Mix a descaling solution by combining equal parts of white vinegar and water. The amount needed will depend on the size of your water reservoir. If your Keurig provides descaling solution packets, follow the instructions on the packet.
- Run the Descaling Cycle: Place a large mug on the drip tray to collect the descaling solution. Pour the descaling solution into the water reservoir. Start a brewing cycle without inserting a K-Cup pod. Repeat the process until the reservoir is empty and the mug is full.
- Rinse the Machine: Refill the water reservoir with clean, cold water and run multiple brewing cycles without a K-Cup pod to rinse out any remaining descaling solution.
- Clean the Water Reservoir and Drip Tray: Wash the water reservoir and drip tray with warm, soapy water and rinse thoroughly. Let them air-dry before putting them back in the machine.
Remember to check your Keurig’s user manual for model-specific cleaning instructions and safety guidelines. Proper cleaning and maintenance will help ensure your Keurig continues to deliver delicious, freshly brewed beverages every time.
Above is steps on How to Turn on Keurig. Now, let’s see some tips and guides on How to Turn on Keurig as below.
TIPS AND GUIDES ON HOW TO TURN ON KEURIG.

1. SOME TIPS ON HOW TO TURN ON KEURIG.
here are some helpful tips on how to turn on a Keurig coffee maker:
- Inspect the Power Source: Before turning on the Keurig, ensure that it is properly plugged into a working electrical outlet. Check the power cord for any damages or loose connections.
- Clean and Fill the Water Reservoir: Make sure the water reservoir is clean and free from any debris or leftover water. Fill the reservoir with clean, cold water up to the desired level (between the minimum and maximum fill lines).
- Close the Water Reservoir Lid Securely: Ensure that the water reservoir lid is closed securely to prevent any leaks during operation.
- Check the Control Panel: Keurig models have a control panel with various buttons or touch controls. Familiarize yourself with the buttons and their functions. Look for the power button, which is typically labeled with a power symbol (circle with a vertical line).
- Preheating (If Required): Some Keurig models require preheating before they are ready to brew. If your machine needs preheating, it will indicate this on the display panel. Allow the preheating process to complete before proceeding.
- Avoid Overfilling: When adding water to the reservoir, be mindful not to overfill it. Pouring in excess water can lead to spills and create a mess during the brewing process.
- Clean the K-Cup Holder: Before inserting a K-Cup pod, check the K-Cup holder to ensure it is clean and free from any leftover coffee grounds or tea leaves. If needed, rinse the holder under running water and let it dry before use.
- Follow Safety Instructions: Always adhere to safety instructions provided in the user manual. For instance, do not use the Keurig if it has a damaged power cord or if it has been immersed in water.
- Wait for Indicator Lights: After turning on the Keurig, wait for the control panel to light up and display readiness indicators (e.g., “Ready to Brew” or “Add Water”). This indicates that the machine is operational and ready to brew your favorite hot beverage.
- Read the User Manual: While turning on a Keurig is generally straightforward, each model may have specific features and functionalities. It’s always beneficial to read the user manual that comes with your Keurig to get acquainted with your particular machine.
By following these tips, you can efficiently turn on your Keurig and start enjoying delicious hot beverages in no time.
You can see How to Turn on Keurig as above.
2. WHY IS KEURIG NOT TURNING ON?
If your Keurig is not turning on, there could be several reasons for this issue. Here are some common troubleshooting steps to help identify and resolve the problem:
- Check the Power Source: Ensure that the Keurig is properly plugged into a working electrical outlet. Sometimes, the power cord may become loose or disconnected, preventing the machine from turning on.
- Inspect the Power Cord: Check the power cord for any damages, fraying, or cuts. A damaged power cord may interrupt the flow of electricity to the Keurig and prevent it from powering on. If you find any damage, do not use the machine, and consider replacing the power cord or contacting Keurig’s customer support for assistance.
- Reset the Keurig: If the Keurig appears to be unresponsive, try performing a reset. Unplug the machine from the electrical outlet, wait for a minute or two, and then plug it back in. This can help reset any temporary electrical glitches and may resolve the issue.
- Check for Power Indicator Lights: If your Keurig model has indicator lights on the control panel, check if they are illuminated when you try to turn on the machine. If the power indicator lights are not lit, it indicates that there is no power reaching the Keurig.
- Inspect the Water Reservoir Lid: Some Keurig models have a safety feature that prevents the machine from turning on if the water reservoir lid is not securely closed. Ensure that the water reservoir lid is closed properly.
- Verify Preheating Process (If Applicable): Some Keurig models require a preheating process before they become operational. If your machine needs preheating, wait for the preheating cycle to complete before attempting to brew.
- Test Another Electrical Outlet: Try plugging the Keurig into a different electrical outlet to rule out any issues with the original outlet or power source.
- Inspect the Circuit Breaker or Fuse Box: Check the circuit breaker or fuse box to ensure that there are no tripped breakers or blown fuses that could be affecting the power supply.
- Contact Keurig Customer Support: If you have tried all the above steps and your Keurig still does not turn on, it’s best to contact Keurig’s customer support or refer to the user manual for further troubleshooting or repair options.
Remember, safety is crucial when dealing with electrical appliances. If you are unsure about any steps or encounter persistent issues, it’s best to seek professional assistance or contact Keurig’s customer support for guidance.
You can refer How to Turn on Keurig as above.
3. HOW DO I RESET MY KEURIG IF IT WONT WORK?
If your Keurig coffee maker is not working properly, performing a reset can often resolve minor issues or glitches. Here’s how you can reset your Keurig:
Resetting a Keurig Coffee Maker:
- Power Off: Turn off the Keurig by pressing the power button or unplugging it from the electrical outlet.
- Empty the Water Reservoir: Remove the water reservoir from the machine and pour out any remaining water.
- Unplug the Machine: Unplug the Keurig from the electrical outlet and wait for at least 30 seconds.
- Reconnect and Power On: Plug the Keurig back into the electrical outlet and turn it on by pressing the power button or plugging it in.
- Perform a Test Brew: Once the Keurig is powered on, place a mug on the drip tray, and try running a test brew cycle without inserting a K-Cup pod. This helps flush out any air or blockages in the system.
- Check for Proper Functionality: Observe the Keurig during the test brew. If it starts brewing water and dispenses it into the mug, it indicates that the reset was successful, and the machine is back to its normal operation.
- Clean the Machine: Regularly clean and descale your Keurig to prevent potential issues and maintain optimal performance. Refer to the user manual for specific cleaning instructions and descaling recommendations.
If the reset doesn’t resolve the problem and your Keurig is still not working, it’s possible that there may be an underlying issue that requires further troubleshooting or professional assistance. In such cases, consider reaching out to Keurig’s customer support or referring to the user manual for additional troubleshooting tips.
Remember to exercise caution while troubleshooting electrical appliances, and always follow the safety guidelines provided in the user manual. If you are uncertain about any steps or encounter persistent issues, seek professional assistance or contact Keurig’s customer support for guidance.
Please see How to Turn on Keurig as above.
4. WHY WON’T MY KEURIG TURN ON AFTER BREWING WITHOUT WATER?
If your Keurig won’t turn on after brewing without water, it is likely due to a safety feature designed to protect the machine from damage. Brewing without water can cause the heating element inside the Keurig to overheat, potentially leading to malfunctions or hazards.
To prevent this, Keurig machines are equipped with safety mechanisms that automatically shut off the machine or prevent it from turning on if it detects low or no water in the reservoir.
If you accidentally brewed without water and now your Keurig won’t turn on, follow these steps:
- Unplug the Machine: Immediately unplug the Keurig from the electrical outlet to disconnect it from the power source.
- Allow It to Cool Down: Let the Keurig cool down for a while to ensure that the heating element returns to a safe temperature.
- Refill the Water Reservoir: Open the water reservoir lid and fill it with clean, cold water up to the desired level (between the minimum and maximum fill lines).
- Plug It Back In: After the Keurig has cooled down and you have refilled the water reservoir, plug it back into the electrical outlet.
- Perform a Reset: If the Keurig doesn’t turn on automatically, try performing a reset by unplugging the machine for about 30 seconds and then plugging it back in.
- Turn It On: Once the Keurig is plugged back in, press the power button to turn it on. If it powers on successfully, the safety feature should be reset, and the machine should work as normal.
- Test Brew: To check if everything is functioning correctly, try running a test brew cycle with water (without inserting a K-Cup pod) to ensure the machine is working as expected.
Remember, brewing without water is not recommended, as it can cause damage to your Keurig. Always ensure the water reservoir is filled before starting a brew cycle. If the problem persists or you encounter any other issues with your Keurig, consult the user manual for troubleshooting tips or contact Keurig’s customer support for assistance.
Please refer How to Turn on Keurig as above.
5. WHY WON’T MY KEURIG MACHINE TURN ON AFTER DESCALING?
If your Keurig machine won’t turn on after descaling, there could be several reasons for this issue. Descaling involves using a solution to remove mineral buildup from the internal components of the Keurig.
While descaling is essential for maintaining the machine’s performance, it’s crucial to follow the descaling instructions provided by the manufacturer. Here are some possible reasons and troubleshooting steps:
- Improper Descaling Process: If the descaling process was not performed correctly, it might have affected the machine’s electrical components or caused an issue with the water flow. Review the descaling instructions in the user manual and ensure you followed all the steps correctly.
- Electrical Glitch: Sometimes, descaling can cause temporary electrical glitches, leading to the machine not turning on. Try performing a reset by unplugging the Keurig from the electrical outlet for about 30 seconds and then plugging it back in.
- Water Reservoir Not Properly Seated: Ensure that the water reservoir is correctly seated and locked into place. If the reservoir is not securely in place, the machine’s safety mechanism might prevent it from turning on.
- Water Reservoir Not Filled: Some Keurig models have a safety feature that requires the water reservoir to be filled to a certain level before the machine turns on. Check that the water reservoir is adequately filled with clean, cold water.
- Clogged Water Line: Descaling can sometimes loosen mineral deposits, which may lead to clogs in the water line. If the water line is clogged, the machine might not turn on. Refer to the user manual for guidance on how to unclog the water line.
- Power Source Issues: Check if the electrical outlet is functioning correctly by plugging in another device to see if it works. If there’s an issue with the outlet, the Keurig won’t receive power and won’t turn on.
- Machine Defect or Malfunction: In rare cases, a Keurig machine may have a defect or malfunction that prevents it from turning on after descaling. If none of the above steps resolve the issue, contact Keurig’s customer support for further assistance or inquire about possible warranty coverage.
It’s essential to be cautious when troubleshooting electrical appliances. If you are unsure about any steps or encounter persistent issues, seek professional assistance or contact Keurig’s customer support for guidance.
There are How to Turn on Keurig as above.
6. HOW TO TROUBLESHOOT COMMON PROBLEM AT KEURIG?
Troubleshooting common problems with a Keurig coffee maker can help identify and resolve issues that may arise during regular use. Here are some common problems and their potential solutions:
- Keurig Won’t Turn On:
- Ensure that the machine is properly plugged into a working electrical outlet.
- Check the power cord for any damages or loose connections.
- Perform a reset by unplugging the Keurig from the electrical outlet for about 30 seconds and then plugging it back in.
- Slow or Incomplete Brewing:
- Check the water reservoir to ensure it is adequately filled with clean, cold water.
- If your Keurig has a descaling indicator, it might be time to descale the machine to remove mineral buildup that could be affecting water flow. Follow the descaling instructions in the user manual.
- Clean the K-Cup holder and needle to ensure they are free from any clogs or coffee grounds that might impede water flow.
- Leaking or Dripping During Brewing:
- Check if the K-Cup pod is properly inserted and the K-Cup holder is fully closed.
- Clean the exit needle, located at the bottom of the K-Cup holder, as it could be blocked by coffee grounds or debris.
- Inspect the rubber gasket on the bottom of the K-Cup holder for any damages or misalignment.
- Weak or Watery Coffee:
- Use the correct cup size setting to ensure the right water-to-coffee ratio.
- Check if the K-Cup pod is properly sealed and has not been punctured before brewing.
- If your Keurig has a strength control feature, adjust it to a stronger setting.
- Machine Stuck in Brewing Mode:
- If the machine appears to be stuck in brewing mode, perform a reset by unplugging it from the electrical outlet for about 30 seconds and then plugging it back in.
- Keurig Displays Error Message:
- Refer to the user manual to identify the specific error code or message. The manual should provide troubleshooting steps for the particular error.
- Keurig Overheats or Shuts Off Abruptly:
- Ensure that the water reservoir is properly filled, and never run the Keurig without water to prevent overheating.
- Clean the machine’s heating element to ensure proper function.
If you encounter persistent issues that cannot be resolved through troubleshooting, consider reaching out to Keurig’s customer support for further assistance. Always refer to the user manual for specific troubleshooting tips and safety guidelines for your Keurig model.
We introduce How to Turn on Keurig as above.
7. COMMON MISTAKES ON HOW TO TURN ON KEURIG.
Turning on a Keurig coffee maker is generally a straightforward process, but some common mistakes can occur. Here are some of the most frequent errors people make on how to turn on Keurig:
- Not Plugging It In: One of the most common mistakes is forgetting to plug the Keurig into a working electrical outlet. Double-check that the machine is properly connected to a power source before attempting to turn it on.
- Not Filling the Water Reservoir: If the water reservoir is empty or not filled to the appropriate level, the Keurig may not turn on. Always ensure the water reservoir has enough clean, cold water before powering on the machine.
- Not Closing the Water Reservoir Lid Securely: Some Keurig models have safety features that prevent the machine from turning on if the water reservoir lid is not securely closed. Make sure the lid is properly closed and latched.
- Power Button Not Pressed: Depending on the model, the Keurig may have a power button that needs to be pressed to turn on the machine. Look for the power button on the control panel and press it to activate the Keurig.
- Not Waiting for Preheating: Some Keurig models require a preheating process before they are ready to brew. If your machine needs preheating, wait for the preheating cycle to complete before attempting to brew.
- Unresponsive Control Panel: If the control panel doesn’t light up or respond to your inputs, the Keurig may not turn on. Check if the machine is properly plugged in and try performing a reset by unplugging it for about 30 seconds and then plugging it back in.
- Water Reservoir Not Seated Properly: If the water reservoir is not properly seated and locked into place, the Keurig’s safety mechanism may prevent it from turning on. Ensure the reservoir is correctly positioned.
- Machine Needs Descale Reset: After descaling the Keurig, some models require a reset to clear any error messages. Refer to the user manual for specific instructions on how to perform a descale reset.
- Faulty Power Cord or Outlet: Sometimes, the power cord may be damaged or the electrical outlet may be faulty, preventing the Keurig from turning on. Check the power cord for any damages and try using a different electrical outlet to rule out any issues with the power source.
Always consult the user manual for your specific Keurig model for detailed instructions on how to turn it on and troubleshoot any issues. If you encounter persistent problems, consider reaching out to Keurig’s customer support for further assistance.
You can see How to Turn on Keurig as above.
FAQS ABOUT HOW TO TURN ON KEURIG.

Here are 8 frequently asked questions (FAQs) about how to turn on Keurig coffee maker, along with their respective answers:
1. Question 1: How do I turn on my Keurig for the first time?
A: To turn on your Keurig for the first time, place it on a stable surface near an electrical outlet. Fill the water reservoir with clean, cold water, and then plug in the machine. Press the power button on the control panel to turn it on.
2. Question 2: Why isn’t my Keurig turning on after I plug it in?
A: If your Keurig isn’t turning on after plugging it in, check the power source and make sure the outlet is working. Ensure the power cord is properly connected, and try performing a reset by unplugging the machine for about 30 seconds and then plugging it back in.
3. Question 3: How do I know if my Keurig is ready to brew after turning it on?
A: Most Keurig models have indicator lights on the control panel. When the machine is ready to brew, the control panel will display a “Ready to Brew” message, and the appropriate indicator light will be lit.
You can see How to Turn on Keurig as above.
4. Question 4: Can I turn on my Keurig without water in the reservoir?
A: No, you should never turn on your Keurig without water in the reservoir. Brewing without water can damage the machine’s heating element and may void the warranty. Always ensure the water reservoir is filled before turning on the Keurig.
5. Question 5: What should I do if my Keurig won’t turn on after brewing without water?
A: If your Keurig won’t turn on after brewing without water, unplug the machine immediately. Allow it to cool down, refill the water reservoir with clean, cold water, and then plug it back in. Perform a reset and try turning it on again.
6. Question 6: Can I turn on my Keurig if the water reservoir is not closed properly?
A: No, if the water reservoir is not closed securely, the Keurig’s safety feature may prevent it from turning on. Always make sure the water reservoir lid is properly closed and latched before attempting to turn on the machine.
You can refer How to Turn on Keurig as above.
7. Question 7: How do I know if my Keurig needs descaling after turning it on?
A: Some Keurig models have a descale indicator that will light up when it’s time to descale the machine. Additionally, if your Keurig is brewing slowly or the taste of the beverages is off, it may indicate the need for descaling.
8. Question 8: How often should I turn off my Keurig when not in use?
A: Keurig machines have energy-saving features, such as auto-off functionality, that automatically turn off the machine after a period of inactivity. If your Keurig has this feature, it’s best to leave it on, as it will conserve energy and turn off by itself when not in use for a while.
Always refer to the user manual that comes with your specific Keurig model for detailed instructions on how to turn it on and operate it safely.
Please see How to Turn on Keurig as above.
CONCLUSION.
In conclusion, operating a Keurig coffee maker is a simple and convenient way to enjoy a variety of hot beverages at home or in the office. Understanding how to turn on your Keurig correctly is essential for a smooth brewing experience.
By following the proper steps on How to Turn on Keurig, including ensuring the water reservoir is filled, securely closing the lid, and powering on the machine, you can easily brew your favorite coffee, tea, or hot beverage.
Avoid common mistakes, such as brewing without water or neglecting to plug in the Keurig, as these can lead to potential issues and affect the machine’s performance. If you encounter any difficulties, consult the user manual for troubleshooting tips or reach out to Keurig’s customer support for assistance.
Remember to maintain your Keurig regularly by cleaning and descaling it as recommended to ensure optimal performance and the best-tasting beverages. With proper care and attention, your Keurig will continue to be a reliable and convenient companion for your daily caffeine fix. Happy brewing!
Read more:
Top 8 Best Dual Coffee Maker Reviews in 2024