How to Use Keurig Mini? Good Tips and Guides in 2024
HOW TO USE KEURIG MINI? GOOD TIPS AND GUIDES IN 2024.
Welcome to the world of convenient and flavorful coffee brewing with the Keurig Mini! Whether you’re a coffee enthusiast or simply in need of a quick caffeine fix, the Keurig Mini is a compact and user-friendly brewing system that brings the coffee shop experience right into your home or office.
With its sleek design and hassle-free operation, this single-serve coffee maker has gained immense popularity for its ability to deliver a fresh cup of coffee within minutes.
In this comprehensive guide, we will take you through the step-by-step process of using the Keurig Mini, ensuring that you extract the maximum potential from this remarkable machine. From setting it up for the first time to exploring the various brewing options and maintaining the appliance for long-lasting performance, we’ll cover it all.
Whether you’re a proud new owner of the Keurig Mini or looking to upgrade your brewing skills, this article will equip you with the knowledge and confidence to brew the perfect cup of coffee every time. So, grab your favorite coffee pods and let’s dive into the world of Keurig Mini brewing mastery!

HOW TO USE KEURIG MINI?
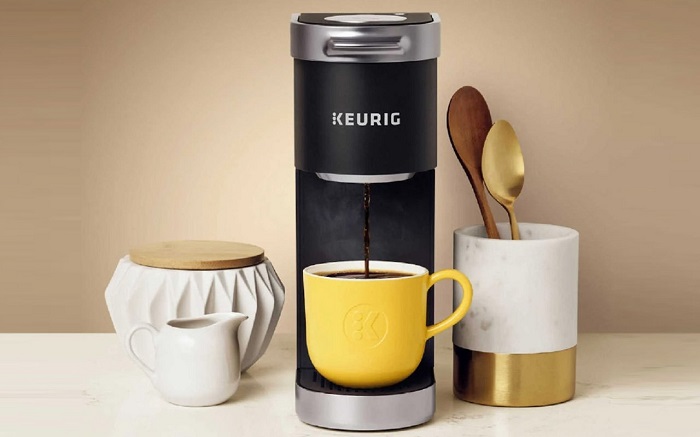
1. WHAT IS KEURIG MINI?
The Keurig Mini, also known as the Keurig Mini Brewer, is a compact and versatile single-serve coffee maker. It is part of the renowned Keurig line of brewing systems, which have revolutionized the way people enjoy coffee at home, in the office, or on the go.
Designed with convenience in mind, the Keurig Mini offers a hassle-free brewing experience, allowing you to enjoy a fresh cup of coffee in a matter of minutes. Its compact size makes it ideal for small spaces such as apartments, dorm rooms, or office desks where larger coffee machines may not fit.
The Keurig Mini operates with the help of coffee pods, commonly known as K-Cups, which are pre-packaged with a variety of coffee blends, flavors, and even other beverages like tea and hot chocolate. With a wide range of K-Cup options available, you can easily brew your preferred coffee or beverage without the need for grinding coffee beans or dealing with messy filters.
One of the key features of the Keurig Mini is its simplicity. It typically has a straightforward interface with minimal buttons, making it easy to use even for beginners. The brewing process involves inserting a K-Cup into the machine, selecting your desired cup size, and pressing a button to initiate the brewing cycle.
The Keurig Mini then rapidly heats the water and dispenses it through the K-Cup, providing you with a freshly brewed cup of coffee in no time.
The Keurig Mini offers a convenient solution for those seeking a quick and personalized coffee experience without the complexities often associated with traditional coffee brewing methods. Its compact size, ease of use, and versatility have made it a popular choice among coffee lovers worldwide.
You can see How to Use Keurig Mini as below.
2. WHAT ARE BENEFITS OF KEURIG MINI?
The Keurig Mini offers several benefits that have contributed to its popularity among coffee enthusiasts. Here are some key advantages of using the Keurig Mini:
- Convenience: The Keurig Mini is designed for convenience, providing a quick and hassle-free coffee brewing experience. With its simple operation and fast brewing time, you can have a fresh cup of coffee at your fingertips in minutes, without the need for complicated brewing processes or manual grinding of coffee beans.
- Compact Size: The Keurig Mini is compact and space-saving, making it an excellent choice for small kitchens, dorm rooms, offices, or any area with limited countertop space. Its sleek design allows it to fit seamlessly into various environments without occupying much room.
- Versatility: The Keurig Mini offers a wide range of beverage options beyond coffee. It is compatible with a vast selection of K-Cups, allowing you to brew not only different coffee blends but also teas, hot chocolates, iced beverages, and more. This versatility caters to various preferences and ensures there’s something for everyone.
- Customization: The Keurig Mini allows you to customize your cup of coffee according to your taste preferences. You can choose from multiple cup sizes, ranging from small espresso shots to larger travel mugs, ensuring you get the right amount of coffee every time. Additionally, with a vast assortment of K-Cups available in different flavors and strengths, you can experiment and find your perfect brew.
- Ease of Cleaning: The Keurig Mini simplifies the cleaning process compared to traditional coffee makers. The absence of coffee grounds and filters eliminates the need for messy clean-up, making it easier to maintain and keep your brewing system in good condition.
- Energy Efficiency: Keurig Minis often come with an energy-saving feature such as an auto-off function. This helps conserve energy by automatically powering down the machine when it has been idle for a certain period. This feature not only reduces energy consumption but also provides peace of mind for users concerned about energy efficiency.
- On-the-Go Brewing: The compact size of the Keurig Mini makes it portable and suitable for on-the-go brewing. Whether you’re traveling, camping, or simply want to enjoy your favorite coffee outside of your home or office, you can easily bring the Keurig Mini along and enjoy a cup of freshly brewed coffee wherever you go.
These benefits collectively make the Keurig Mini an attractive option for individuals seeking a convenient, customizable, and efficient coffee brewing experience.
You can refer How to Use Keurig Mini as below.
3. HOW MANY TYPES OF KEURIG MINI?
There are a few different types of Keurig Mini coffee makers available on the market. Here are the main variations:
- Keurig K-Mini: The Keurig K-Mini is the standard model and the original version of the Keurig Mini. It is a compact, single-serve coffee maker that brews one cup at a time. It features a removable water reservoir with a capacity of approximately 12 ounces, allowing you to brew a single cup of coffee without the need for frequent refilling.
- Keurig K-Mini Plus: The Keurig K-Mini Plus is an upgraded version of the K-Mini. It offers additional features compared to the standard model, such as a removable drip tray that accommodates travel mugs up to 7 inches tall, allowing for more versatility in cup size options. The K-Mini Plus also features a strength control setting, which allows you to adjust the intensity of your coffee flavor.
- Keurig K-Mini Plus Single Serve Coffee Maker with My K-Cup Universal Reusable Coffee Filter: This particular variant of the K-Mini Plus comes with the added benefit of the My K-Cup Universal Reusable Coffee Filter. This reusable filter allows you to brew coffee using your own ground coffee, providing greater flexibility in choosing your preferred coffee beans or blends.
It’s worth noting that Keurig may introduce new models or variations of the Keurig Mini over time, so it’s a good idea to check for the latest offerings from the manufacturer or authorized retailers.
Please see How to Use Keurig Mini as below.
4. WHAT SHOULD WE CONSIDER BEFORE BUYING KEURIG MINI?
Before buying a Keurig Mini, there are a few important factors to consider ensuring it meets your specific needs and preferences. Here are some key considerations:
- Brewing Capacity: The Keurig Mini is designed for single-serve brewing, meaning it produces one cup of coffee at a time. If you often need to brew multiple cups of coffee simultaneously or entertain guests frequently, you may want to consider a larger Keurig model or a different coffee maker that offers a higher brewing capacity.
- Cup Size Options: Different Keurig Mini models offer various cup size options, ranging from small espresso shots to larger travel mugs. Consider the cup sizes you typically prefer and ensure that the Keurig Mini you choose can accommodate your desired cup size. Some models have adjustable drip trays that can accommodate taller mugs or travel cups.
- Space and Portability: The compact size of the Keurig Mini is one of its key advantages. However, it’s important to assess the available space in your kitchen or desired location before purchasing. Measure the countertop or space where you plan to place the Keurig Mini to ensure it fits comfortably. If you require a portable coffee maker for travel or other purposes, consider the weight and dimensions of the Keurig Mini for ease of transport.
- Compatibility with K-Cups: Keurig Minis are compatible with a wide range of K-Cup pods, which come in various flavors and brands. If you have specific preferences for certain coffee brands, flavors, or specialty beverages like tea or hot chocolate, ensure that the Keurig Mini you choose supports the specific K-Cups you prefer.
- Maintenance and Cleaning: Consider the ease of maintenance and cleaning when choosing a Keurig Mini. Look for models that have removable parts, such as the drip tray and water reservoir, as these can make cleaning more convenient. Additionally, check if the machine has descaling features or indicators, as regular descaling is essential for optimal performance and longevity.
- Budget: Set a budget for your coffee maker purchase and compare the prices of different Keurig Mini models. The prices may vary based on the included features and functionality. Determine the features that are most important to you and find a model that fits within your budget while meeting your needs.
By considering these factors, you can ensure that the Keurig Mini you choose aligns with your brewing preferences, available space, and budget, providing you with a satisfying coffee experience.
Please refer How to Use Keurig Mini as below.
5. STEPS ON HOW TO USE KEURIG MINI?
Here are the general steps on how to use a Keurig Mini:
- Prepare the Keurig Mini:
- Remove the Keurig Mini from its packaging and place it on a stable and level surface.
- Open the top lid of the machine to access the brewer’s compartment.
- Add Water:
- Lift the water reservoir lid located at the back of the Keurig Mini.
- Fill the reservoir with clean, cold water. Be careful not to overfill it.
- Close the water reservoir lid securely.
- Preheat the Keurig Mini:
- Plug in the Keurig Mini and turn on the power button, usually located on the side or bottom of the machine.
- The machine will begin preheating. It may take a minute or two for the water to heat up. During this time, the indicator lights may flash or change color.
- Insert a K-Cup:
- Lift the handle on the front of the Keurig Mini to open the brewer’s compartment.
- Insert a K-Cup pod of your choice into the pod holder. Make sure the foil lid is facing up.
- Close the handle completely until it clicks into place.
- Select the Brew Size:
- Look for the buttons or controls on the front panel of the Keurig Mini that correspond to different cup sizes. Common options include small (6 oz), medium (8 oz), and large (10 oz).
- Choose your desired cup size by pressing the appropriate button. The indicator lights may change or remain steady to indicate your selection.
- Brew the Coffee:
- Once you’ve selected the cup size, the Keurig Mini will start the brewing process. Hot water will be injected into the K-Cup, extracting the coffee.
- The brewing time may vary depending on the cup size and specific model. It typically takes less than a minute to brew a single cup of coffee.
- Collect Your Coffee:
- Position your cup or mug on the drip tray beneath the dispenser nozzle.
- The brewed coffee will flow into your cup. The Keurig Mini will automatically stop dispensing once the selected cup size is reached.
- Enjoy Your Coffee:
- Carefully remove your cup from the drip tray.
- Add any desired cream, sugar, or other flavorings to customize your coffee.
- Savor and enjoy your freshly brewed cup of coffee!
Remember to follow the manufacturer’s instructions specific to your Keurig Mini model, as the location of buttons and controls may vary. Additionally, consult the user manual for any additional features or maintenance guidelines for your specific machine.
There are How to Use Keurig Mini as above.
6. HOW TO CLEAN KEURIG MINI?
Cleaning your Keurig Mini is essential to maintain its performance and ensure the best tasting coffee. Here’s a step-by-step guide on how to clean your Keurig Mini:
Regular Cleaning:
- Unplug the Keurig Mini: Before starting the cleaning process, make sure the machine is unplugged from the power source for safety.
- Disassemble and Wash Removable Parts:
- Remove the water reservoir by lifting the lid and pulling it straight up.
- Remove the drip tray from the bottom of the machine.
- If your Keurig Mini has a removable pod holder, take it out as well.
- Wash these removable parts, including the water reservoir, drip tray, and pod holder, using warm soapy water. Rinse them thoroughly and let them air dry.
- Clean the Needle:
- Open the Keurig Mini’s brewer compartment by lifting the handle.
- Locate the needle that punctures the K-Cup. It is usually at the top of the pod holder.
- Use a paper clip or the Keurig needle cleaning tool (if provided) to gently remove any clogs or coffee grounds from the needle. Be careful not to damage the needle.
- Clean the Exterior:
- Wipe the exterior surfaces of the Keurig Mini using a damp cloth or sponge. Avoid using abrasive cleaners or harsh chemicals that may damage the machine’s finish.
- Reassemble and Reinsert Parts:
- Once all the removable parts are dry, reinsert the cleaned water reservoir, drip tray, and pod holder back into their respective positions.
- Ensure that each part is securely in place.
- Descale the Keurig Mini (Every 3-6 months):
- Descaling is necessary to remove mineral deposits that may build up inside the machine over time.
- Follow the descaling instructions provided in the Keurig Mini’s user manual or descaling solution packaging. Typically, this involves using a descaling solution mixed with water and running it through the machine.
- After descaling, run multiple cycles of clean water through the Keurig Mini to rinse out any remaining descaling solution.
Note: It’s important to refer to your specific Keurig Mini model’s user manual for any additional or model-specific cleaning instructions or recommendations.
Regular cleaning and descaling will help maintain the performance and longevity of your Keurig Mini, ensuring that you continue to enjoy delicious cups of coffee.
We introduce How to Use Keurig Mini as above.
7. HOW TO MAINTAIN KEURIG MINI?
Maintaining your Keurig Mini will help ensure its optimal performance and longevity. Here are some key maintenance practices to keep in mind:
- Regular Cleaning: Clean your Keurig Mini at regular intervals to prevent the buildup of coffee residue and maintain the quality of your brew. Follow the steps outlined in the previous response on how to clean your Keurig Mini.
- Descaling: Descaling is an essential maintenance task that helps remove mineral deposits and scale buildup inside the machine. It is recommended to descale your Keurig Mini every 3-6 months or as indicated by the manufacturer. Follow the descaling instructions provided in the user manual or descaling solution packaging.
- Use Filtered Water: Using filtered or bottled water instead of tap water can help reduce the chances of mineral deposits and scale buildup, which can affect the performance of your Keurig Mini. This is particularly important if you live in an area with hard water.
- Replace Water Filters (if applicable): Some Keurig Mini models come with a water filter. If your machine has one, make sure to replace it regularly according to the manufacturer’s instructions. This helps improve the taste of your coffee and prevents impurities from affecting the brewing process.
- Handle the Machine with Care: Be gentle when handling and operating the Keurig Mini to avoid any damage. Close the brewer compartment firmly but avoid slamming it shut. Handle the water reservoir and other removable parts carefully to prevent breakage.
- Check for Clogs: Periodically check the needle that punctures the K-Cup for any clogs or blockages. If you notice any debris or coffee grounds obstructing the needle, use a paper clip or the Keurig needle cleaning tool (if provided) to remove them.
- Follow Usage Guidelines: Adhere to the guidelines provided by the manufacturer regarding the types of K-Cups to use, brewing sizes, and other operating instructions. This helps ensure optimal performance and prevents any potential issues.
- Keep the Machine Dry: After cleaning, make sure all the removable parts are thoroughly dry before reassembling and using the Keurig Mini. Additionally, wipe down the exterior of the machine to keep it clean and dry.
By following these maintenance practices, you can keep your Keurig Mini in good condition, ensuring consistent performance and a great cup of coffee every time you brew.
Above is How to Use Keurig Mini. Besides that, we provide some tips and guides on How to Use Keurig Mini as below.
TIPS AND GUIDES ON HOW TO USE KEURIG MINI.

1. SOME TIPS ON HOW TO USE KEURIG MINI.
Here are some tips to enhance your experience and make the most out of using your Keurig Mini:
- Preheat the Machine: Before brewing your first cup of coffee, it’s a good idea to allow the Keurig Mini to preheat fully. This helps ensure that the water is at the optimal temperature for brewing. Allow the machine to heat up for a minute or two after turning it on before inserting a K-Cup.
- Prime the Machine (First Use or After Extended Period of Non-Use): If you’re using the Keurig Mini for the first time or after a long period of non-use, it’s recommended to prime the machine. To do this, run a brew cycle without inserting a K-Cup. This helps flush out any air bubbles and ensures the optimal flow of water.
- Experiment with Brew Strength: If your Keurig Mini has a strength control setting, feel free to experiment with different strength options to find your preferred brew intensity. Adjusting the strength control can give you a milder or stronger cup of coffee, depending on your taste preferences.
- Customize Cup Size: Take advantage of the different cup size options available on your Keurig Mini. Whether you prefer a small, intense shot of espresso or a larger cup for a more relaxed coffee experience, select the appropriate cup size to suit your needs.
- Try Different K-Cups: Explore the wide range of K-Cup options available to find your favorite flavors, blends, and specialty beverages. Keurig offers an extensive selection of coffee, tea, hot chocolate, and other beverages from various brands. Don’t be afraid to experiment and discover new favorites!
- Clean and Descale Regularly: Regularly cleaning and descaling your Keurig Mini is essential for optimal performance and maintaining the quality of your coffee. Follow the cleaning and descaling instructions provided by the manufacturer to ensure your machine stays in great shape.
- Consider a Reusable Coffee Filter: If you prefer to use your own ground coffee, consider purchasing a reusable coffee filter compatible with your Keurig Mini. This allows you to enjoy your preferred coffee beans and reduces waste from single-use K-Cups.
- Keep Supplies Stocked: Make sure to have an adequate supply of K-Cups or your preferred coffee pods to enjoy a seamless brewing experience. It’s helpful to keep an assortment of flavors and strengths on hand to cater to different tastes.
By following these tips, you can enhance your brewing experience with the Keurig Mini and tailor your coffee to your liking. Enjoy exploring the world of flavors and convenience that the Keurig Mini brings to your home or office!
You can see How to Use Keurig Mini as above.
2. HOW TO USE KEURIG K-CUP?
Using a Keurig K-Cup is simple and convenient. Here’s a step-by-step guide on how to use a Keurig K-Cup:
- Prepare the Keurig Machine:
- Ensure that your Keurig machine is plugged in and turned on.
- Fill the water reservoir with clean, cold water. The exact capacity will depend on your specific Keurig model.
- Insert the K-Cup:
- Lift the handle on the front of the Keurig machine to open the brewer compartment.
- Place the K-Cup into the pod holder. Make sure the foil lid of the K-Cup is facing up.
- Close the handle firmly until it clicks into place, securing the K-Cup in the machine.
- Select the Brew Size:
- Look for the buttons or controls on the front panel of your Keurig machine that correspond to different cup sizes. Common options include small (6 oz), medium (8 oz), and large (10 oz).
- Choose your desired cup size by pressing the appropriate button. The indicator lights may change or remain steady to indicate your selection.
- Brew the Coffee:
- Once you’ve selected the cup size, the Keurig machine will start the brewing process.
- The machine will pierce the foil lid of the K-Cup and hot water will be injected into the cup to brew the coffee.
- Depending on the specific model and cup size, it typically takes less than a minute for the brewing process to complete.
- Collect Your Coffee:
- Position your cup or mug on the drip tray beneath the dispenser nozzle.
- The brewed coffee will flow into your cup. The Keurig machine will automatically stop dispensing once the selected cup size is reached.
- Dispose of the Used K-Cup:
- After brewing, lift the handle on the front of the Keurig machine to open the brewer compartment.
- Carefully remove the used K-Cup from the pod holder and dispose of it appropriately. Some K-Cups are recyclable or can be repurposed, so be sure to check the packaging for recycling instructions.
- Enjoy Your Coffee:
- Add any desired cream, sugar, or other flavorings to customize your coffee.
- Savor and enjoy your freshly brewed cup of coffee!
Remember to consult your specific Keurig machine’s user manual for any additional instructions or features unique to your model. Using Keurig K-Cups offers a convenient and hassle-free way to enjoy a variety of coffee flavors and blends with minimal effort.
You can refer How to Use Keurig Mini as above.
3. HOW TO USE KEURIG SINGLE SERVE?
Using a Keurig single-serve coffee maker is straightforward and convenient. Here’s a step-by-step guide on how to use a Keurig single-serve machine:
- Prepare the Keurig Machine:
- Ensure that your Keurig machine is plugged in and turned on.
- Fill the water reservoir with clean, cold water. The exact capacity will depend on your specific Keurig model.
- Power On and Preheat:
- Press the power button to turn on the Keurig machine.
- The machine will begin preheating. It may take a minute or two for the water to heat up. During this time, the indicator lights may flash or change color.
- Insert the K-Cup:
- Lift the handle on the front of the Keurig machine to open the brewer compartment.
- Place the K-Cup into the pod holder. Make sure the foil lid of the K-Cup is facing up.
- Close the handle firmly until it clicks into place, securing the K-Cup in the machine.
- Select the Brew Size:
- Look for the buttons or controls on the front panel of your Keurig machine that correspond to different cup sizes. Common options include small (6 oz), medium (8 oz), and large (10 oz).
- Choose your desired cup size by pressing the appropriate button. The indicator lights may change or remain steady to indicate your selection.
- Brew the Coffee:
- Once you’ve selected the cup size, the Keurig machine will start the brewing process.
- The machine will pierce the foil lid of the K-Cup, and hot water will be injected into the cup to brew the coffee.
- Depending on the specific model and cup size, it typically takes less than a minute for the brewing process to complete.
- Collect Your Coffee:
- Position your cup or mug on the drip tray beneath the dispenser nozzle.
- The brewed coffee will flow into your cup. The Keurig machine will automatically stop dispensing once the selected cup size is reached.
- Customize and Enjoy:
- Add any desired cream, sugar, or other flavorings to customize your coffee.
- Savor and enjoy your freshly brewed cup of coffee!
- Cleaning and Maintenance:
- After each use, dispose of the used K-Cup by opening the brewer compartment and removing it. Dispose of it appropriately.
- Regularly clean and descale your Keurig machine following the manufacturer’s instructions to maintain its performance and ensure the best tasting coffee.
Remember to consult your specific Keurig machine’s user manual for any additional instructions or features unique to your model. Keurig single-serve machines offer a convenient and efficient way to enjoy a cup of coffee tailored to your preferences with minimal effort.
Please see How to Use Keurig Mini as above.
4. HOW TO TURN ON KEURIG?
To turn on a Keurig coffee maker, follow these steps:
- Locate the power button: The power button is typically located on the side or bottom of the Keurig machine. Look for a button labeled with a power symbol or the word “Power.”
- Plug in the machine: Before turning on the Keurig, make sure it is properly plugged into a functioning electrical outlet.
- Press the power button: Once you have located the power button, press it to turn on the Keurig. The machine will begin the startup process, and you may see lights or indicators turning on to signify that it is powered on.
- Wait for preheating: After turning on the Keurig, the machine will go through a preheating phase to heat up the water in the reservoir. This process typically takes a minute or two, and during this time, you may see lights flashing or changing color to indicate that the Keurig is heating up.
- Ready to brew: Once the preheating is complete, the Keurig is ready for use. You can now proceed to insert a K-Cup, select your desired cup size, and start brewing your coffee.
Remember that the specific location of the power button may vary slightly depending on the model of your Keurig coffee maker. If you’re unsure about the exact location, refer to the user manual that came with your Keurig machine for precise instructions.
Please refer How to Use Keurig Mini as above.
5. HOW TO MAKE ESPRESSO WITH KEURIG?
While Keurig machines are primarily designed for brewing regular coffee, you can still make a concentrated espresso-like beverage using a Keurig by following these steps:
- Choose the right K-Cup: Look for K-Cups specifically labeled as espresso or dark roast. These K-Cups are designed to produce a stronger and more concentrated coffee flavor.
- Preheat the machine: Turn on your Keurig machine and allow it to preheat fully. This ensures that the water is at the optimal temperature for brewing.
- Insert the K-Cup: Lift the handle on the front of the Keurig machine to open the brewer compartment. Place the espresso-specific K-Cup into the pod holder with the foil lid facing up. Close the handle securely.
- Select the smallest cup size: Choose the smallest cup size available on your Keurig machine. This will result in a more concentrated espresso-like beverage.
- Brew the coffee: Press the brew button to initiate the brewing process. The Keurig machine will pierce the K-Cup, and hot water will flow through the coffee grounds, extracting the flavor.
- Monitor the brewing time: Keep an eye on the brewing process to ensure you stop it at the desired strength. Unlike traditional espresso machines, Keurig machines may not provide the same level of control over extraction time, so it’s important to stop the brew cycle based on your preference.
- Adjust and customize: Once the brewing process is complete, you can add milk, sugar, or any other desired flavorings to customize your espresso-like beverage.
It’s important to note that while Keurig espresso-style beverages can be quite concentrated, they may not replicate the exact flavor and texture of traditional espresso from an espresso machine. However, this method allows you to achieve a stronger, more concentrated coffee using your Keurig machine.
There are How to Use Keurig Mini as above.
6. HOW TO MAKE COFFEE IN A KEURIG WITHOUT K CUPS?
If you don’t have K-Cups or prefer not to use them, you can still make coffee in a Keurig machine using your own ground coffee by following these steps:
- Prepare your supplies: Gather your Keurig machine, a reusable coffee filter (compatible with your specific Keurig model), and your preferred ground coffee.
- Fill the water reservoir: Ensure that the Keurig machine’s water reservoir is filled with clean, cold water. The exact capacity will depend on your specific Keurig model.
- Insert the reusable coffee filter: Open the brewer compartment by lifting the handle on the front of the Keurig machine. Insert the reusable coffee filter into the pod holder.
- Add ground coffee: Measure the desired amount of ground coffee into the reusable coffee filter. Refer to the recommended coffee-to-water ratio for your preferred strength. Avoid overfilling the filter to prevent any grounds from overflowing.
- Close the handle and position your cup: Close the brewer compartment by lowering the handle until it clicks into place. Place your cup or mug on the drip tray beneath the dispenser nozzle.
- Select the brew size: Choose the desired cup size by pressing the appropriate button on the Keurig machine’s control panel. Select the size that matches the amount of water you want to use for your coffee.
- Start brewing: Press the brew button to initiate the brewing process. The hot water will flow through the reusable coffee filter and extract the flavor from the ground coffee.
- Collect your coffee: The brewed coffee will flow into your cup. The Keurig machine will automatically stop dispensing once the selected cup size is reached.
- Customize and enjoy: Add any desired cream, sugar, or other flavorings to customize your coffee. Stir well and savor your freshly brewed cup!
Remember to clean the reusable coffee filter after each use, following the manufacturer’s instructions. This method allows you to enjoy the convenience of the Keurig machine while using your own ground coffee, reducing waste and providing more control over the coffee brewing process.
We introduce How to Use Keurig Mini as above.
7. HOW HOT DOES KEURIG WATER GET?
Keurig machines typically heat water to a temperature range of approximately 187°F to 197°F (86°C to 92°C) during the brewing process. The specific temperature may vary slightly depending on the model and settings of your Keurig machine.
Keurig machines are designed to reach and maintain an optimal temperature range for brewing coffee and other hot beverages. This temperature range helps ensure proper extraction and flavor development while also taking into account safety considerations.
You can see How to Use Keurig Mini as above.
8. WHY DOES MY KEURIG SAY DESCALE?
If your Keurig machine displays a “Descale” message or indicator, it means that the machine’s internal components have accumulated mineral deposits and scale buildup over time. Descaling is necessary to remove these deposits and ensure optimal performance. Here are a few reasons why your Keurig might prompt you to descale:
- Mineral Content in Water: The water you use in your Keurig machine might contain minerals, such as calcium and magnesium, which can precipitate and form scale. Over time, this scale can affect the machine’s heating element, water flow, and overall functionality.
- Hard Water Usage: If you frequently use hard water in your Keurig machine, the mineral buildup can occur more rapidly. Hard water refers to water that contains higher levels of minerals.
- Lack of Regular Descaling: If you haven’t performed routine descaling as recommended by the manufacturer, the scale buildup inside the machine can reach a point where the Keurig machine prompts you to descale.
To address the “Descale” message, it’s essential to follow the descaling process specific to your Keurig machine. Consult your Keurig machine’s user manual for detailed instructions on how to descale your particular model. Descaling typically involves using a descaling solution or a mixture of vinegar and water, which helps dissolve the mineral deposits.
Following the manufacturer’s guidelines ensures the effective removal of scale and helps maintain the performance and longevity of your Keurig machine.
You can refer How to Use Keurig Mini as above.
9. WHY IS MY KEURIG NOT TURNING ON?
There can be several reasons why your Keurig is not turning on. Here are some possible causes and troubleshooting steps to try:
- Power Supply: Ensure that your Keurig is properly plugged into a functioning electrical outlet. Check if there is power in the outlet by plugging in another device or appliance. If there is no power, try using a different outlet or checking the circuit breaker.
- Power Button: Verify that you are pressing the power button correctly. Some Keurig models have a switch or button located on the side or bottom of the machine. Press and hold the power button for a few seconds to see if it powers on.
- Water Reservoir: Make sure the water reservoir is properly seated and filled with water. Some Keurig models have a water level sensor that prevents the machine from turning on if the reservoir is empty or not properly positioned.
- Power Interruption: If there was a recent power outage or surge, the Keurig may need to be reset. Unplug the machine from the power outlet, wait for a few minutes, and then plug it back in. Try turning it on again.
- Check Cord and Connections: Inspect the power cord for any damage or frayed wires. Ensure that the cord is securely connected to both the machine and the power outlet.
- Service Required: If none of the above steps resolve the issue, it’s possible that there may be a more significant problem with the Keurig machine. In such cases, it is recommended to contact Keurig customer support or refer to the user manual for further troubleshooting steps or to arrange for repair or replacement.
Remember, these troubleshooting steps may vary based on the specific model of your Keurig machine. Referring to the user manual or contacting Keurig customer support for model-specific assistance is always recommended if you encounter persistent issues with your Keurig not turning on.
Please see How to Use Keurig Mini as above.
10 .COMMON MISTAKES ON HOW TO USE KEURIG MINI.
While using a Keurig Mini is generally straightforward, here are some common mistakes to avoid when using it:
- Incorrect Water Level: Ensure that the water reservoir is filled with the appropriate amount of water for your desired cup size. Filling it too much or too little may result in improper brewing or insufficient coffee volume.
- Incorrect Cup Placement: Make sure to position your cup properly on the drip tray beneath the dispenser nozzle. If it is not aligned correctly, it may lead to spills or misdirected coffee flow.
- Neglecting Regular Cleaning: It’s essential to clean your Keurig Mini regularly to prevent coffee residue buildup and maintain the quality of your brew. Failing to clean it can impact the machine’s performance and affect the taste of your coffee.
- Forgetting to Descaling: Descaling is an important maintenance task to remove mineral deposits from the machine. Neglecting to descale as recommended by the manufacturer can affect the machine’s functionality and potentially lead to issues like clogging or inconsistent brewing.
- Using Incorrect K-Cup Size: Ensure that the K-Cup size matches the selected cup size on the Keurig Mini. Using a K-Cup size that is larger than the cup size selected can result in overflow or coffee grounds ending up in your cup.
- Overstuffing the K-Cup: Avoid overfilling or compacting the coffee grounds in the K-Cup. Overstuffing can lead to issues with water flow and proper extraction.
- Using Wrong K-Cup Compatibility: Ensure that the K-Cups you use are compatible with the Keurig Mini. Some Keurig machines have specific requirements or limitations on K-Cup compatibility. Using incompatible K-Cups may cause issues with brewing or damage the machine.
- Not Following User Manual Instructions: It’s important to read and follow the user manual that comes with your Keurig Mini. The manual provides specific instructions, guidelines, and safety information that can help you properly operate and maintain your machine.
By avoiding these common mistakes, you can optimize your experience with the Keurig Mini and enjoy consistent and flavorful cups of coffee
Please refer How to Use Keurig Mini as above.
FAQS ABOUT HOW TO USE KEURIG MINI.

Here are 8 frequently asked questions (FAQs) about how to use the Keurig Mini, along with their respective answers:
1. Question 1. How do I clean my Keurig Mini?
A1. To clean your Keurig Mini, remove and wash the removable parts, such as the water reservoir and drip tray, with warm soapy water. Use a paper clip or the Keurig needle cleaning tool to clean the needle. Refer to the user manual for specific cleaning instructions.
2. Question 2. Can I use my own ground coffee in the Keurig Mini?
A2. Yes, you can use your own ground coffee in the Keurig Mini by using a reusable coffee filter that is compatible with your machine. This allows you to enjoy your preferred coffee beans or blends.
3. Question 3. How often should I descale my Keurig Mini?
A3. It is recommended to descale your Keurig Mini every 3-6 months or as indicated by the manufacturer. Descaling helps remove mineral deposits and scale buildup that can affect the performance and taste of your coffee.
There are How to Use Keurig Mini as above.
4. Question 4. Can I use different cup sizes with the Keurig Mini?
A4. Yes, the Keurig Mini offers different cup size options, typically including small (6 oz), medium (8 oz), and large (10 oz). Choose the appropriate cup size button on the machine to match your desired serving.
5. Question 5. How long does it take for the Keurig Mini to brew a cup of coffee?
A5. The brewing time with the Keurig Mini typically takes less than a minute, depending on the cup size selected and the specific model of your machine.
6. Question 6. Can I use any K-Cup with the Keurig Mini?
A6. The Keurig Mini is compatible with a wide range of K-Cups, offering various coffee flavors, blends, and specialty beverages. Ensure that you use K-Cups that are compatible with your Keurig Mini model.
We introduce How to Use Keurig Mini as above.
7. Question 7. How do I adjust the strength of the coffee with the Keurig Mini?
A7. Some Keurig Mini models, such as the K-Mini Plus, offer a strength control setting. You can adjust the coffee strength by selecting the appropriate strength option on the machine, which can provide a milder or stronger cup of coffee.
8. Question 8. Can I use the Keurig Mini for brewing beverages other than coffee?
A8. Yes, the Keurig Mini can be used to brew various hot beverages, including tea, hot chocolate, and other specialty drinks. Ensure that you use compatible K-Cups for the specific beverage you wish to brew.
Remember to consult the user manual specific to your Keurig Mini model for more detailed instructions and information.
Please see How to Use Keurig Mini as above.
CONCLUSION.
In conclusion, the Keurig Mini is a compact and convenient coffee maker that offers an effortless brewing experience for single servings of coffee. With its user-friendly design and compatibility with a wide range of K-Cups, the Keurig Mini provides a quick and customizable coffee solution.
We discussed the benefits of the Keurig Mini, including its space-saving size, ease of use, and the wide variety of flavors and beverage options available through K-Cups. We also covered important considerations before purchasing, such as brewing capacity, cup size options, space requirements, and compatibility with K-Cups.
To use the Keurig Mini effectively, we provided step-by-step instructions on How to Use Keurig Mini, make espresso-like beverages, and brew coffee using your own ground coffee with a reusable coffee filter. We highlighted the significance of regular cleaning, descaling, and maintenance to ensure optimal performance and longevity.
Additionally, we addressed common mistakes to avoid when using the Keurig Mini and answered frequently asked questions to help users troubleshoot any concerns they may have had.
By following these guidelines and tips, you can enjoy the convenience and versatility of the Keurig Mini, savoring delicious cups of coffee and other hot beverages in the comfort of your home or office. Cheers to a delightful coffee experience with your Keurig Mini!
Read more:
Top 8 Best Cheap Espresso Machine Reviews in 2024